How to Apply for DDS Services in California
Step-by-step guide to applying for California Department of Developmental Services (DDS) programs through your local regional center. Learn about eligibility, required documents, timelines, and what to expect during the intake process.
Quick Start Checklist
Ready to apply? You'll need these three things:
- Contact information for your local regional center
- Documentation of developmental disability (medical records, school reports, assessments)
- Basic information about the individual seeking services (birth date, Social Security number, address)
Download Complete Checklist (PDF) →
Applying for DDS services California is the first step toward accessing comprehensive supports for individuals with developmental disabilities. The application process, handled through your local regional center, determines eligibility and connects you with the services and resources you need.
This guide walks you through every step of the DDS application process, from initial contact to receiving services. Understanding your rights under the Lanterman Act ensures you can advocate effectively throughout this journey.
Application Process Overview
- Step 1: Understand Eligibility Requirements
- Step 2: Find Your Regional Center
- Step 3: Make Initial Contact
- Step 4: Gather Required Documentation
- Step 5: Complete Intake Interview
- Step 6: Assessment & Evaluation
- Step 7: Receive Eligibility Decision
- Step 8: Develop Your IPP (Individual Program Plan)
- Step 9: Services Begin
- Timeline Expectations
- Common Mistakes to Avoid
Step 1
Understand Eligibility Requirements
Before applying, it's helpful to understand DDS eligibility criteria. California DDS serves individuals with developmental disabilities that meet specific requirements under the Lanterman Act.
Who Qualifies for DDS Services?
To be eligible, an individual must have a developmental disability that:
- Originates before age 18 – The condition must begin during the developmental period
- Is expected to continue indefinitely – Not a temporary condition
- Constitutes a substantial disability – Results in significant functional limitations in three or more areas of major life activity
Qualifying Conditions Include:
Intellectual Disability
Significant limitations in intellectual functioning and adaptive behavior
Autism Spectrum Disorder
Developmental condition affecting communication and behavior
Cerebral Palsy
Group of disorders affecting movement, muscle tone, and posture
Epilepsy
Neurological condition causing recurrent seizures (when it causes substantial disability)
Closely Related Conditions
Conditions similar to intellectual disability requiring similar treatment (e.g., Down syndrome, Fragile X syndrome, Prader-Willi syndrome)
Disabling Conditions Before Age 18
Other conditions that originated before age 18 and result in substantial functional limitations
Important: Diagnosis Alone Doesn't Guarantee Eligibility
Having one of these conditions doesn't automatically qualify you for services. The regional center will assess whether the condition causes substantial functional limitations in at least three of these major life activities:
- Self-care
- Receptive and expressive language
- Learning
- Mobility
- Self-direction
- Capacity for independent living
- Economic self-sufficiency
Learn More About Eligibility:
- Eligibility Criteria Explained (Plain Language)
- What Documentation You Need for DDS Eligibility
- DDS vs Department of Rehabilitation: Who Does What?
Step 2
Find Your Regional Center
California has 21 regional centers serving different geographic areas. Your local regional center is your gateway to all DDS services. You must apply through the regional center that serves your county of residence.
Major County Regional Centers:
Los Angeles County
Multiple regional centers serve LA County
San Diego County
San Diego Regional Center
Orange County
Regional Center of Orange County
Riverside County
Inland Regional Center
San Bernardino County
Inland Regional Center
Sacramento County
Alta California Regional Center
Santa Clara County
San Andreas Regional Center
Alameda County
Regional Center of the East Bay
San Francisco County
Golden Gate Regional Center
Fresno County
Central Valley Regional Center
Complete Regional Center Directory →
What If I Live Near a County Border?
Some regional centers serve multiple counties. Use the regional center finder tool to identify the correct center for your specific address.
Step 3
Make Initial Contact
Once you've identified your regional center, it's time to reach out and begin the application process.
How to Contact Your Regional Center:
Phone (Recommended)
Call during business hours (typically Monday-Friday, 8am-5pm). Ask to speak with the Intake Department.
What to say: "I'd like to apply for DDS services" or "I need information about the intake process."
Online Referral Form
Most regional centers have online intake forms on their websites. This allows you to start the process outside business hours.
In-Person Visit
You can visit the regional center office directly. Call ahead to ensure intake staff are available.
Written Referral
You can submit a written application via mail or email. However, phone contact typically starts the process faster.
Who Can Make the Referral?
Anyone can refer an individual to a regional center, including:
- The individual themselves (self-referral)
- Parents or family members
- Doctors or healthcare providers
- Teachers or school staff
- Social workers or case managers
- Friends or community members
Important: You don't need a doctor's referral to apply for DDS services. Anyone can initiate the application process.
What Happens During Initial Contact?
When you first contact the regional center, the intake staff will:
- Ask basic information about the individual (name, birth date, address)
- Briefly describe the concerns or reason for referral
- Explain the intake and assessment process
- Schedule your intake interview (usually within 15 days)
- Tell you what documents to bring to the interview
Prepare for Your Call:
- Preparing for Your Intake Interview
- How to Involve an Advocate or Family Member
- Top 7 Mistakes Families Make During DDS Intake
Step 4

Gather Required Documentation
Before your intake interview, gather documentation that shows the individual's developmental disability and functional limitations. Strong documentation helps establish eligibility and speeds up the process.
Essential Documents to Gather:
1. Medical Records
- Birth records and hospital discharge summaries
- Pediatrician or doctor notes documenting developmental delays
- Neurological evaluations or brain imaging results
- Genetic testing results (if applicable)
- Diagnosis letters from specialists
- Current medication lists
- Immunization records
2. Psychological/Educational Assessments
- IQ testing (psychoeducational evaluations)
- Autism diagnostic evaluations (ADOS, ADI-R)
- Adaptive behavior assessments (Vineland, ABAS)
- Speech and language evaluations
- Occupational therapy evaluations
- Physical therapy evaluations
- School district evaluations (IEP documents)
3. Educational Records
- Current IEP (Individualized Education Program)
- IFSP (Individualized Family Service Plan) for children under 3
- Report cards showing academic performance
- Teacher reports documenting challenges
- School attendance records
- 504 Plan (if applicable)
4. Personal Identification
- Birth certificate
- Social Security card or number
- Proof of California residency (utility bill, lease, etc.)
- Immigration documents (if applicable)
- Photo ID for adult applicants
5. Insurance Information
- Medi-Cal card (if enrolled)
- Private insurance cards
- Medicare information (if applicable)
Don't Have All Documents? Apply Anyway!
You don't need every document to start the application process. Regional centers can help you obtain missing records. Don't let missing paperwork delay your application.
Documentation Resources:
- What Documentation You Need for DDS Eligibility
- Checklist: Applying for DDS in California (Printable)
- Sample Letters: Appeals, Records Requests, Modifications
Step 5
Complete the Intake Interview
The intake interview is typically scheduled within 15 days of your initial contact. This in-depth conversation allows the regional center to learn about the individual's needs, challenges, and goals.
What to Expect During the Interview:
- Location: Usually at the regional center office, though home visits may be available for young children or those with mobility challenges
- Duration: 1-3 hours depending on complexity
- Format: Conversation with an intake coordinator or social worker
- Who should attend: The individual (if able), parents/guardians, and any advocates or family members who can provide helpful information
Topics Covered in the Intake Interview:
Developmental History
Pregnancy, birth, early childhood milestones, when delays were first noticed
Medical History
Diagnoses, treatments, hospitalizations, current medications, specialists involved
Current Functioning
Daily living skills, communication, mobility, self-care, behavior
Educational Status
School placement, services received, academic progress, IEP supports
Family Situation
Living arrangement, family members, support system, cultural considerations
Current Services
Therapies, medical care, educational supports, community programs
Immediate Needs
Urgent concerns, safety issues, crisis situations, family stress
Goals & Preferences
What the individual/family hopes to achieve, preferred services, cultural values
Tips for a Successful Intake Interview:
- Bring your documentation – Have copies of all relevant records organized and ready
- Bring a support person – Having a family member or advocate can help you remember details and ask questions
- Be honest and detailed – Share both strengths and challenges; don't minimize difficulties
- Focus on functional limitations – Describe how the disability impacts daily life activities
- Provide specific examples – Instead of "he has trouble communicating," say "he knows about 20 words and uses gestures for most requests"
- Take notes – Write down what the intake coordinator tells you about next steps and timelines
- Ask questions – This is your opportunity to understand the process and your rights
- Request accommodations if needed – Language interpretation, accessible location, extra time
What Happens After the Intake Interview?
After the interview, the regional center will:
- Review your documentation
- Determine if additional assessments are needed
- Schedule any required evaluations
- Make an eligibility determination within 120 days of your application date
Intake Interview Resources:
- Preparing for Your Intake Interview
- Top 7 Mistakes Families Make During DDS Intake
- How to Track Deadlines and Follow Ups
Step 6
Assessment & Evaluation Process
Based on your intake interview and documentation, the regional center will determine if additional assessments are needed to make an eligibility decision.
Types of Assessments That May Be Required:
- Psychological Assessment – IQ testing, cognitive evaluation, adaptive behavior assessment
- Medical Evaluation – Neurological exam, genetic testing, physical examination
- Developmental Assessment – Milestone evaluation for young children
- Functional Assessment – Evaluation of daily living skills and independence
- Speech/Language Assessment – Communication abilities and needs
- Social History – Family interview, home visit, collateral contacts
Who Conducts Assessments?
Assessments are typically conducted by:
- Regional center psychologists
- Contracted providers (doctors, therapists, specialists)
- Your existing healthcare providers (if recent assessments are available)
Cost: Regional center assessments are provided at no charge. You are not billed for evaluations needed to determine eligibility.
Independent Assessments
If you disagree with the regional center's assessment, you have the right to request an independent assessment at regional center expense under certain circumstances.
Assessment Resources:
- Requesting an Independent Assessment: How-To
- Your Rights During the Assessment Process
Step 7
Receive Eligibility Decision
Within 120 days of your application date, the regional center must make an eligibility determination. You'll receive written notice of the decision.
Possible Outcomes:
Eligible for Services
If approved, you'll be assigned a service coordinator (also called case manager or resource coordinator) who will help you:
- Develop your Individual Program Plan (IPP)
- Access services and supports
- Navigate the DDS system
- Connect with vendors and providers
Next step: Schedule your IPP planning meeting (usually within 60 days of eligibility)
Not Eligible for Services
If denied, the notice must explain:
- The specific reason for denial
- The evidence considered in making the decision
- Your right to appeal
- How to request a fair hearing
- Alternative resources you may qualify for
Next step: Review the decision carefully and consider appealing if you disagree
⏳ More Information Needed
Sometimes additional assessments or documentation are required. The regional center will tell you what's needed and schedule follow-up evaluations.
Next step: Provide requested information or complete additional assessments
What If You're Denied?
If you believe the denial was incorrect, you have appeal rights under California law. The Lanterman Act protects your right to challenge eligibility decisions.
Appeal Options:
- Informal Resolution – Request a meeting with the regional center director to discuss the decision
- Mediation – Voluntary process with a neutral mediator to reach agreement
- Fair Hearing – Formal legal hearing before an administrative law judge
- State Hearing – Appeal to the Office of Administrative Hearings (OAH)
Important Deadlines:
You have 65 days from the date you receive the denial notice to request a fair hearing. Don't miss this deadline! File your appeal promptly even if you're still gathering documentation.
Appeal Resources:
- DDS Appeals: Complete Step-by-Step Guide
- How to File a DDS Fair Hearing Request
- Mediation vs Fair Hearing: Which Should You Choose?
- Understanding Notice of Proposed Action
- Your Rights Under the Lanterman Act
Step 8
Develop Your Individual Program Plan (IPP)
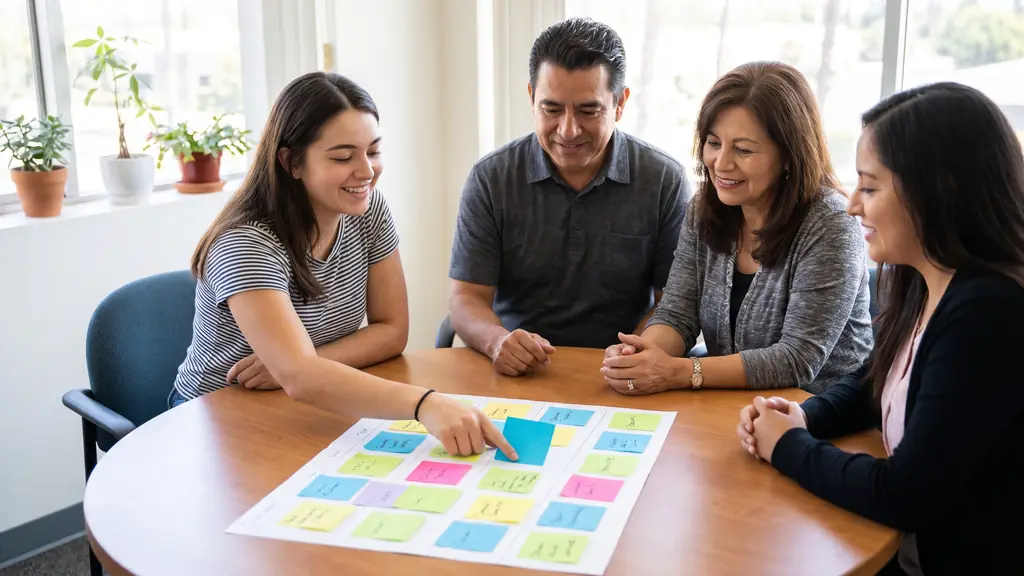
Once you're found eligible, the next critical step is creating your Individual Program Plan (IPP). This is the document that outlines what services you'll receive and how they'll help you achieve your goals.
What is an IPP?
Your IPP is a personalized, written plan that:
- Identifies your strengths, preferences, and needs
- Establishes your goals for the next year
- Lists the services and supports that will help you reach those goals
- Names the service providers who will deliver supports
- Includes timelines and methods for measuring progress
- Is reviewed and updated at least annually
The IPP Meeting
Your IPP meeting (also called IPP planning meeting or planning team meeting) is where you, your family, your service coordinator, and other team members develop your plan together.
Who Attends IPP Meetings?
- You (the individual receiving services) – or your conservator/guardian if unable to participate
- Your service coordinator (required)
- Regional center representative (who can authorize services)
- Family members you invite
- Advocates or advisors you choose
- Service providers (therapists, teachers, job coaches, etc.) if you invite them
Person-Centered Planning
IPP development must be person-centered, meaning:
- You (or your family) lead the discussion about goals and priorities
- Planning focuses on your strengths and what's important to you
- Services are designed to help you live the life you want
- Your cultural values and preferences are respected
- You choose who participates in your planning
Preparing for Your IPP Meeting
Good preparation leads to better IPPs. Before your meeting:
- Think about your goals – What do you want to achieve? What would make life better?
- Learn about available services – Review the services available through DDS
- Identify your needs – What supports would help you reach your goals?
- Invite your support team – Bring people who know you well and can advocate for you
- Prepare questions – Write down anything you want to ask
- Review previous IPP – If this isn't your first IPP, look at what worked and what didn't
- Consider Self-Determination – Ask about the Self-Determination Program for more control over services
IPP Planning Resources:
- IPP: What to Expect and How to Prepare
- Guide to IPP Goal-Setting (With Templates)
- How to Involve an Advocate or Family Member
- Downloadable Forms: IPP Prep, Hearing Request, Notes Log
What Services Can Be in Your IPP?
Your IPP can include any services necessary to meet your needs, such as:
Early Start Services
For children 0-3: therapy, family support
Employment Services
Job coaching, supported employment, vocational training
Residential Supports
Independent living, supported living, group homes
Family Support
Respite, parent training, crisis services
Day Programs
Adult day programs, activity centers, community integration
Behavioral Supports
Behavior plans, counseling, mental health services
Transportation
Travel training, transportation assistance
Assistive Technology
Communication devices, adaptive equipment
What If the Regional Center Says "No"?
Regional centers sometimes deny requested services. If this happens, you have the right to:
- Receive a written Notice of Proposed Action explaining why
- Request reconsideration or meet with supervisors
- Pursue mediation or fair hearing to appeal the decision
Learn more about your rights to appeal service denials.
Step 9
Services Begin
Once your IPP is finalized and approved, your service coordinator will:
- Connect you with service providers – Vendors who deliver the services in your IPP
- Help you select providers – You typically have choice in who provides your services
- Coordinate start dates – Work with providers to begin services
- Complete necessary paperwork – Service authorizations, vendor agreements
- Monitor service delivery – Ensure you're receiving what's in your IPP
What to Expect After Services Start:
Regular Contact with Service Coordinator
Your service coordinator should maintain regular contact (at minimum, every six months for adults, more frequently for children). They're your main point of contact for questions, concerns, or changes in needs.
Annual IPP Review
Your IPP must be reviewed at least once per year. You can request earlier reviews if your needs change or you're not satisfied with services.
Service Monitoring
Regional centers monitor service quality and verify that vendors are delivering what's authorized. Report any concerns to your service coordinator immediately.
Ongoing Rights
You maintain all your Lanterman Act rights throughout your time receiving services, including the right to appeal any decisions you disagree with.
What If Services Aren't Working?
If you're not satisfied with your services, you have options:
- Talk to your service coordinator – They can often resolve issues or connect you with different providers
- Request an IPP review – You can request a meeting to modify your IPP anytime
- Change service providers – You're not locked into specific vendors
- File a complaint – Regional centers have complaint procedures
- Appeal – Use formal appeal processes if needed
Ongoing Support Resources:
- How to Track Deadlines and Follow Ups
- Vendor Dispute Resolution: Step-by-Step
- Building Your Personal DDS File (Binder System)
- Wellness Toolkit for Ongoing Support
Application Timeline: What to Expect
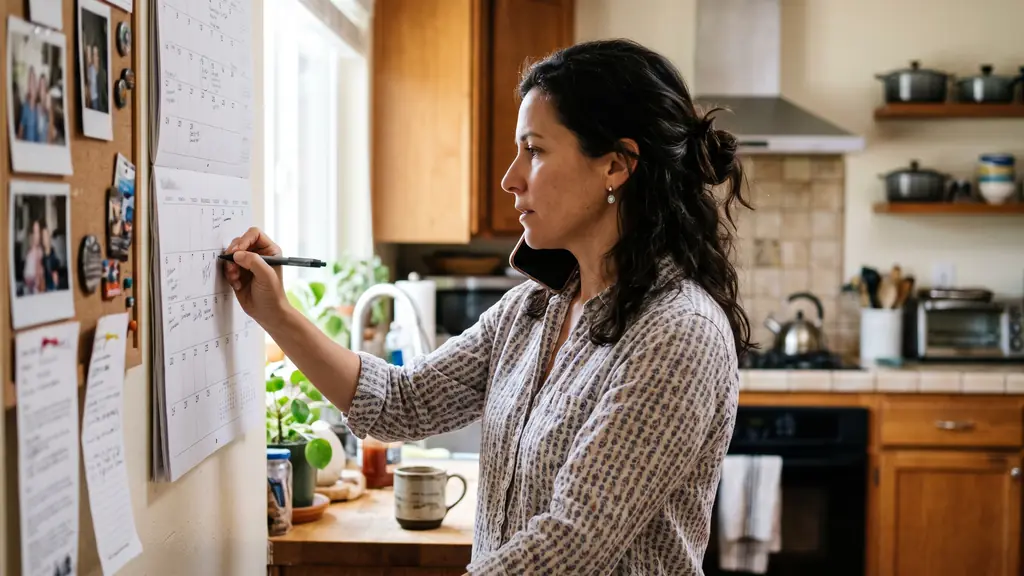
Understanding the timeline helps you know what to expect and when to follow up. Here are the key deadlines in the DDS application process:
Day 1
Application Date
Your application date is when the regional center receives your referral (phone call, written request, or online form). This starts the 120-day eligibility determination clock.
Day 1-15
Intake Interview Scheduled
Regional centers typically schedule your intake interview within 15 days of your application. Exception: Early Start (children 0-3) should be seen within 15 days and receive services within 45 days.
Day 15-90
Assessment Period
If additional assessments are needed, they're typically completed within this timeframe. You should be kept informed of progress and next steps.
Day 120
Eligibility Decision Required
Legal deadline: Regional centers must make an eligibility determination within 120 days of your application. If this deadline passes without a decision, contact the regional center immediately to inquire about the delay.
Day 120-180
IPP Development
If eligible, your IPP meeting should be scheduled within 60 days of your eligibility determination. Services should begin shortly after your IPP is finalized.
What If Deadlines Are Missed?
If the regional center misses the 120-day eligibility deadline or other required timeframes:
- Request a written explanation for the delay
- Document all communication and delays
- Contact the regional center director or ombudsperson
- File a complaint with DDS if necessary
- Consider involving an advocate
Timeline Resources:
Common Mistakes to Avoid
Learn from others' experiences. Here are the most common mistakes families make during the DDS application process—and how to avoid them:
Mistake #1: Waiting for a Doctor's Referral
The Fix: You don't need a doctor's referral to apply. Anyone can start the application process, including self-referral. Don't wait—apply directly to your regional center.
Mistake #2: Downplaying Challenges
The Fix: Be honest and specific about difficulties. Regional centers need to understand the full extent of functional limitations to determine eligibility. Don't minimize struggles—describe worst days, not best days.
Mistake #3: Lacking Documentation
The Fix: Gather comprehensive records before your intake interview. Missing documentation can delay eligibility decisions. Start collecting records as soon as you decide to apply.
Mistake #4: Not Tracking Deadlines
The Fix: Keep a calendar of important dates (application date, 120-day deadline, assessment appointments, etc.). Follow up if deadlines pass without communication from the regional center.
Mistake #5: Not Asking Questions
The Fix: Ask for clarification anytime you don't understand something. Take notes during meetings. Request written explanations of complex processes.
Mistake #6: Going Through the Process Alone
The Fix: Bring family members, friends, or advocates to appointments. Having support helps with information processing, note-taking, and emotional support.
Mistake #7: Not Knowing Your Rights
The Fix: Understand your Lanterman Act rights before starting the process. Know that you have the right to appeal, request assessments, and receive services without discrimination.
Mistake #8: Accepting the First "No"
The Fix: If denied eligibility or specific services, don't assume the decision is final. You have appeal rights. Request written explanations and consider appealing.
Avoid These Mistakes:
- Top 7 Mistakes Families Make During DDS Intake
- Preparing for Your Intake Interview
- Complete Application Checklist (Printable)
Special Considerations for Specific Populations
Children Ages 0-3 (Early Start)
Early Start services have faster timelines. Children referred by age 3 should receive services within 45 days. Learn more about Early Start eligibility and services.
Transition-Age Youth (14-22)
Teens transitioning from school to adult services need special planning. Start IPP transition planning by age 14. Learn about education services and employment support.
Deaf, Hard of Hearing & DeafBlind
Specialized services and accommodations are available. Request ASL interpretation for all meetings. Learn more about specialized resources.
Non-English Speakers
Regional centers must provide interpretation services at no cost. Request interpretation in your preferred language for all meetings and documents.
Adults New to DDS
You can apply for DDS services at any age, as long as your developmental disability originated before age 18. Many adults are diagnosed later in life and become eligible.
Adults in Conservatorship
Conservators can apply on behalf of conserved individuals. The conservatorship papers should be provided during the intake process.
Frequently Asked Questions About Applying for DDS
How long does the DDS application process take?
Regional centers must make an eligibility determination within 120 days of your application date. However, the entire process from application to receiving services typically takes 4-6 months. Early Start services (children 0-3) have faster timelines, with services typically beginning within 45 days of referral.
Do I need a diagnosis before applying?
No. You don't need a formal diagnosis to apply for DDS services. The regional center will conduct assessments as part of the eligibility determination process. However, having existing diagnostic documentation can speed up the process.
Does applying for DDS cost anything?
No. The application process, including all assessments and evaluations conducted by the regional center, is provided at no cost. If you're found eligible, DDS services are also provided free of charge.
Can I apply if I'm not a U.S. citizen?
Yes. DDS services are available to California residents regardless of immigration status. You do not need to be a U.S. citizen or have legal immigration status to apply for or receive services. Regional centers cannot share immigration information with immigration authorities.
What if my child already receives special education services?
Having an IEP (Individualized Education Program) doesn't automatically qualify you for DDS services, but it can provide helpful documentation. DDS and special education serve different purposes and have different eligibility criteria. Many individuals receive both services. Learn more about DDS education services.
Can I reapply if I was previously denied?
Yes. You can reapply if circumstances have changed, if you have new documentation, or if you believe the previous denial was incorrect. You can also appeal the initial denial rather than starting a new application.
What if I live near a regional center border?
You must apply to the regional center that serves your county of residence. Use our regional center finder to identify the correct center for your address. Some regional centers serve multiple counties.
Will applying for DDS affect other benefits?
Generally, no. DDS services typically don't affect eligibility for SSI, Medi-Cal, or other public benefits. In fact, DDS services often complement other supports. However, discuss your specific situation with your service coordinator to understand any potential interactions.
Ready to Apply for DDS Services?
You now have the information you need to start your DDS application. Take the first step today.
Find Your Regional Center
Identify which regional center serves your county
Download the Checklist
Get our printable application preparation checklist
Learn Your Rights
Understand your protections under California law
Additional Application Resources
Before You Apply
- Eligibility Criteria Explained
- Required Documentation Guide
- Find Your Regional Center
- Understanding Available Services
During the Process
- Preparing for Your Intake Interview
- Common Mistakes to Avoid
- Tracking Deadlines and Follow-Ups
- Involving an Advocate
After Applying
- IPP: What to Expect
- Timeline Expectations
- If You're Denied: Appeals Guide
- Understanding Decision Notices
Support & Advocacy
Provider services in Southern California
Services From Congregate Connect
After eligibility, your service coordinator can refer you to a provider. If you live in Congregate Connect’s service area: Congregate Connect serves adults 18 and older in Los Angeles, Riverside and San Bernardino counties.
Links go to cc.care. You can choose any provider your regional center has vendored for a service; listing Congregate Connect here is not a ranking of providers.
Related Programs
Early Start (0-3)
Free early intervention for California infants and toddlers with developmental delays: who qualifies, what services cover, and how to get started.
Regional Center Services
What California's 21 regional centers do, the services they fund, how to find the one that serves your county, and what to say when you first call.
Self‑Determination Program
How California's Self-Determination Program works: individual budgets, choosing your own providers, financial management services, and how to enroll.
Guides in This Area
- Building Your Personal DDS File (Binder System)
- California DDS FAQ #1: Common Questions Answered
- Checklist: Applying for DDS in California (Printable)
- Eligibility Criteria Explained (Plain Language)
- How to Track Deadlines and Follow Ups
- Preparing for Your Intake Interview
- Timelines: From Application to Services
- Top 7 Mistakes Families Make During DDS Intake
- Transportation Services: Vendor Types & Eligibility
- What Documentation You Need for DDS Eligibility
Updated